 ultimate-guide
How to Document Crime Scene Evidence: A Complete Guide
Table of Contents
- Why Proper Crime Scene Documentation Matters
- The Primary Survey and Scene Assessment
- Crime Scene Photography Best Practices
- Video Recording and Field Notes
- Sketching, Measurements, and Scene Mapping
- Chain of Custody Procedures for Evidence Integrity
- Evidence Collection Log Template and Common Documentation Errors
- Digital Evidence and Legal Admissibility Standards
- Legal Admissibility Standards and Professional Documentation
- Frequently Asked Questions
Last Updated: August 25, 2026
Why Proper Crime Scene Documentation Matters
Crime scene documentation is the foundation of every successful investigation. Without accurate, thorough records, even obvious evidence can become inadmissible in court or fail to support your case. A detective's field notes, a photograph taken at the wrong angle, or a single gap in the chain of custody can undermine months of investigative work. Courts reject evidence daily because documentation failed to meet admissibility standards. Proper documentation isn't complicated, it requires discipline, a clear process, and understanding why each step matters.
The Primary Survey and Scene Assessment
The primary survey is your first critical opportunity to document the crime scene before anything changes. Start with a systematic approach: photograph the scene in its undisturbed state, then walk the perimeter using a predetermined pattern (grid, spiral, or linear) depending on layout. Document scene dimensions, points of entry and exit, positioning of furniture, and anything out of place or damaged.
Your primary survey accomplishes three goals: it creates a visual record before evidence collection begins, helps identify all potential evidence locations, and establishes scene security by identifying safe pathways. Take detailed field notes recording time of arrival, weather conditions, lighting, temperature, odors, and the condition of doors and windows. Document positions of bodies or items relative to fixed objects. Spend 20-30 minutes on a thorough primary survey, rushing this step frequently results in missed evidence or scene contamination.
Crime Scene Photography Best Practices
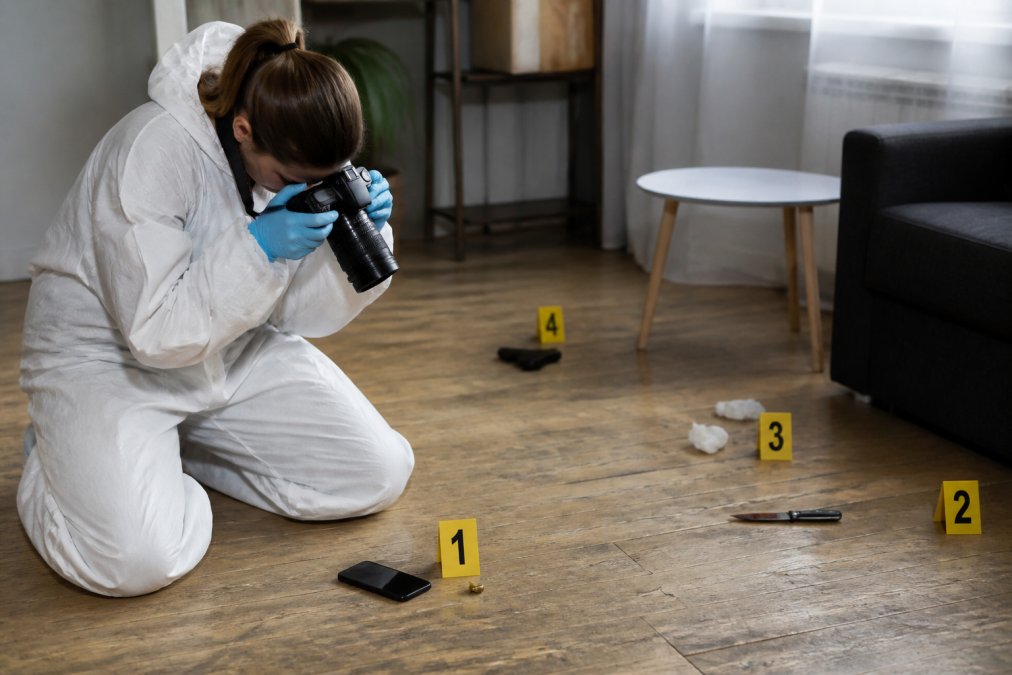
Photography is your permanent visual record. Photograph systematically in three phases: overall shots showing the entire room from multiple angles, medium-range shots of specific areas of interest, and close-ups of individual evidence items.
For close-ups, use a scale marker (ruler or evidence scale card) positioned parallel to the evidence in every photograph. Photograph items from directly above when possible, then from additional angles to show three-dimensional detail. For tool marks, glass fragments, or bloodstains, photograph at multiple angles with oblique lighting to reveal texture and depth.
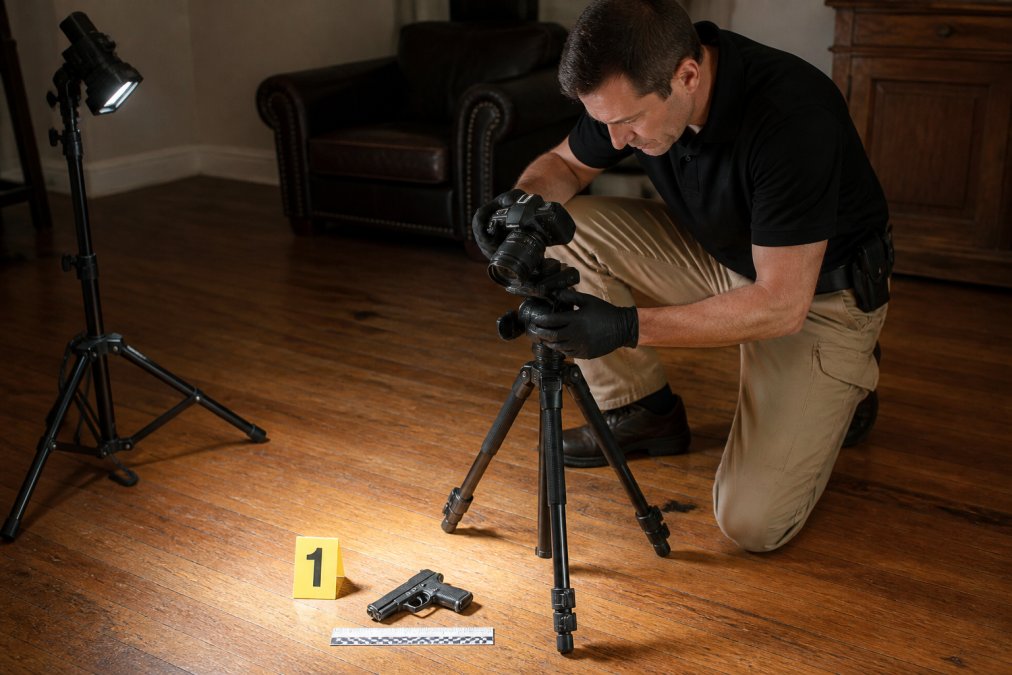
Maintain consistent lighting throughout. Avoid flash in wide-angle shots when possible; natural light provides better context. For close-ups, use controlled lighting that reveals detail without harsh shadows. Document your photography process by recording camera settings, file numbers, date, time, and location for each photograph. Create a photographic log listing every image with a brief description. Photograph evidence before collection whenever possible, once you move an item, you lose documentation of its original position.
Video Recording and Field Notes
Video recording captures spatial relationships and the investigator's observations as they unfold. Keep video simple: maintain steady camera movement, narrate what you're showing, and record the date, time, and location at the beginning.
Field notes capture your observations, interpretations, and reasoning behind investigative decisions. Write notes in real time whenever possible, including date, time, location, weather conditions, personnel present, and a chronological account of actions and observations. Answer specific questions: What was the scene condition upon arrival? What evidence did you identify and where? What contamination risks existed? What photographs and measurements did you record?
Format notes for clarity using separate entries for each time period or location. Number pages and sign each page. If you make an error, cross it out with a single line and write the correction above it, never use white-out. Write notes in the field while observations are fresh; memory fades quickly and details disappear.
Sketching, Measurements, and Scene Mapping
A crime scene sketch provides a two-dimensional record of layout and spatial relationships between evidence items. Create a rough sketch during initial assessment using graph paper or a standard template. Mark scene boundaries, identify fixed reference points (walls, doors, windows), and locate evidence items using measurements from those points.
Measure distances using the baseline mapping technique: establish a baseline (typically along a wall), then measure perpendicular distances from the baseline to each evidence item. Record measurements directly on your sketch. For complex scenes, use triangulation: measure the distance from an evidence item to two fixed reference points, allowing anyone to plot the item's exact location.
Document scene dimensions: room length and width, window and door heights, and distances from evidence items to walls or fixed objects. Create a final, clean sketch after investigation is complete, including a title block with case number, location, date, investigator's name, and scale notation. Use standard symbols: arrows for doors, X's for evidence locations, circles for bodies.
Chain of Custody Procedures for Evidence Integrity
Chain of custody is the documented record of who possessed each piece of evidence, when, and what they did with it. Without an unbroken chain, evidence becomes inadmissible regardless of importance.
Chain of custody begins when you identify an evidence item. Before collecting it, photograph it in place and record its location on your scene sketch. Assign an evidence number and create an evidence tag including case number, evidence number, item description, location found, date and time collected, and collector's name and signature.
Package each item separately in appropriate containers, paper bags for most items, plastic bags for wet evidence, specialized containers for items requiring protection. Seal containers with evidence tape and write evidence information directly on the tape.
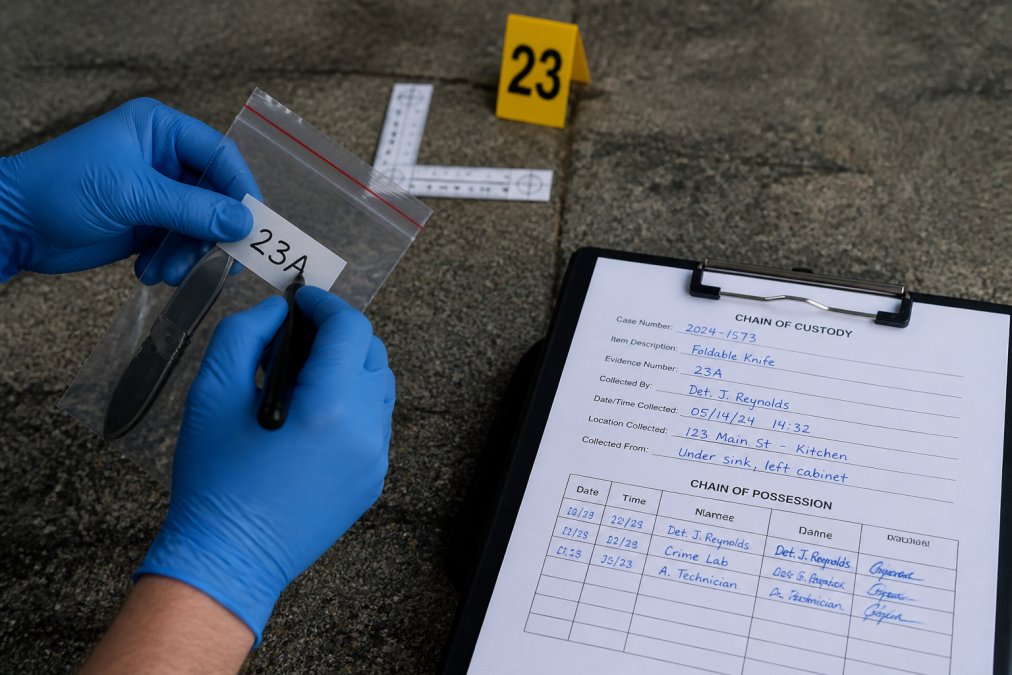
Document every transfer of custody. When evidence changes hands, both parties must sign and date a chain of custody form that travels with the evidence. Include time of transfer, reason for transfer, and signatures of both releasing and receiving parties. Your chain of custody form should include case number, evidence number, item description, collection date and time, collector's name and signature, date and time of each transfer, name and signature of each person receiving evidence, and purpose of each transfer. Never skip documentation of transfers, courts scrutinize every gap in the chain of custody.
Evidence Collection Log Template and Common Documentation Errors
An evidence collection log is your master record of all items collected at the scene, listed chronologically with descriptions, locations, and collector information.
| Evidence # | Description | Location | Time Collected | Collector | Status |
|---|---|---|---|---|---|
| 1 | Blue denim jacket, size L, bloodstain right sleeve | Bedroom floor | 2:15 PM | Detective Smith | Photographed, sealed |
| 2 | Glass fragments, clear | Kitchen window sill | 2:45 PM | Detective Smith | Photographed, sealed |
| 3 | Handwritten note, white paper | Desk drawer | 3:10 PM | Detective Johnson | Photographed, sealed |
| 4 | Metal tool, hammer | Garage workbench | 3:45 PM | Detective Johnson | Photographed, sealed |
The most frequent mistake is inadequate item descriptions. Write descriptions detailed enough that someone reading your log months later understands exactly what the item is. Use a simple sequential numbering system and never reuse numbers. Write clearly, illegible documentation appears intentionally obscured during cross-examination. Record exact collection times, not approximate ones. Use 24-hour time notation to eliminate ambiguity. Document the condition of evidence when collected: if wet, note that; if broken or damaged, document the damage; if you observed biological material or staining, describe it.
Digital Evidence and Legal Admissibility Standards
Digital evidence requires special documentation procedures because digital files can be altered or manipulated. Courts require proof that digital evidence is authentic and unmodified.
Document the source of every digital file, including camera model and serial number for photographs, or device and recording parameters for video. Create a hash value (digital fingerprint) of your files immediately after collection to prove the file hasn't been altered. Maintain original digital files in their unmodified state, making copies only for analysis and review. Store originals on write-protected media or in a secure digital repository, documenting every copy made.
When transferring digital evidence, use the same chain of custody procedures as physical evidence, including file name, file size, hash value, and transfer date and time. Courts apply strict admissibility standards to digital evidence, your documentation must prove authenticity, that the file hasn't been altered, and that the chain of custody is unbroken.
Legal Admissibility Standards and Professional Documentation
Evidence admissibility depends on meeting specific legal standards. The Federal Rules of Evidence govern admissibility in federal courts, and most states have adopted similar rules (uscourts.gov). Rule 901 requires that evidence be authenticated, you must establish that it is what you claim it is through photographs, sketches, field notes, and chain of custody documentation (uscourts.gov). Rule 403 allows judges to exclude evidence if its probative value is substantially outweighed by unfair prejudice risk (uscourts.gov). Poor documentation can trigger this rule.
Document everything as if your work will be challenged in court, because it will be. Assume opposing counsel will scrutinize every photograph, measurement, and signature. Over-documentation is impossible; under-documentation loses cases. Professional documentation standards are non-negotiable in criminal defense, wrongful death, and civil litigation.
Proper documentation of crime scene evidence separates investigations that succeed in court from those that fail despite solid investigative work. The procedures covered in this guide create the foundation for admissible evidence and strong legal outcomes. When you need expert guidance on complex evidence documentation or professional witness interviews, MCP Investigations & Security provides experienced support that criminal defense attorneys, families, and legal teams depend on. Our state-licensed investigators bring over 20 years of experience ensuring that evidence documentation meets legal standards and strengthens your position from investigation through trial. Contact us to discuss how we can support your case with professional documentation and expert witness testimony.
Frequently Asked Questions
What are the four key elements of crime scene documentation?
The four key elements are written field notes capturing observations and details, photography documenting the overall scene and evidence locations, video recording providing temporal context, and sketching with measurements establishing spatial relationships. Together, these create a comprehensive record that supports forensic analysis and ensures evidence integrity throughout the investigative process and courtroom presentation.
Why is the chain of custody critical in evidence documentation?
Chain of custody procedures establish a complete record of who handled evidence, when, and under what conditions. This documentation prevents contamination claims, proves evidence integrity, and is often required for legal admissibility. Courts reject evidence with broken or incomplete chain of custody documentation because it raises reasonable doubt about whether the evidence has been altered or compromised during collection and storage.
How do I properly label and tag evidence from a crime scene?
Use evidence markers with sequential numbering visible in photographs before collection. Label each item with a unique identifier, date, time, location within the scene, collector name, and brief description of contents. Attach tags securely without contaminating the evidence. Document all labeling in your evidence collection log template with corresponding photograph references. This standardized approach prevents mix-ups and supports admissibility requirements in legal proceedings.
What documentation errors most commonly result in inadmissible evidence?
Common errors include incomplete chain of custody records, missing timestamps or collector identification, failure to photograph evidence in situ before collection, inadequate scene sketches lacking measurements or scale references, and poor video quality without audio narration. Additionally, contamination during collection due to improper handling or lack of protective measures, and failure to document the primary survey and initial scene assessment compromise evidence integrity and admissibility in court.
Can digital evidence be documented the same way as physical evidence?
Digital evidence requires specialized documentation including device identification, timestamps, hash values for data integrity, and screenshots showing original state before analysis. Document the digital environment, network connections, and any analysis performed. Chain of custody for digital evidence must track every access point and modification. Because digital evidence is fragile and easily altered, documentation standards are stricter than physical evidence, and expert testimony often accompanies digital evidence presentation in court.
What legal standards apply to crime scene documentation admissibility?
Federal Rules of Evidence require that documentation accurately represent the scene, photographs show relevant details without misleading angles, and chain of custody proves evidence integrity. State rules may vary, but all require that documentation methods follow investigative protocol standards. Expert testimony typically accompanies documentation to explain methodology. Legal admissibility depends on complete, accurate, and properly preserved documentation from initial scene assessment through evidence collection and storage.
This article was written using GrandRanker